I enjoy hot dogs from time to time, but I’m pretty disappointed with a lot of them I’ve bought when dining out (especially from gas stations). Wouldn’t it be fantastic to be able to cook delicious, plump, and fresh hot dogs at home?
In this simple guide, you’ll learn how to cook hot dogs in an air fryer with excellent results. Read on to learn how I did it.
Contents
- Infographic – Air fryer hot dogs quick guide
- Quick summary: Cooking hot dogs in an air fryer
- How & why to preheat your air fryer
- Getting your hot dogs ready to cook
- How long should I cook hot dogs?
- Melting cheese for chili cheese dogs with an air fryer
- What about sausage dogs and bratwurst?
- Final touches and it’s time to eat!
- Clean up & last notes
Infographic – Air fryer hot dogs quick guide
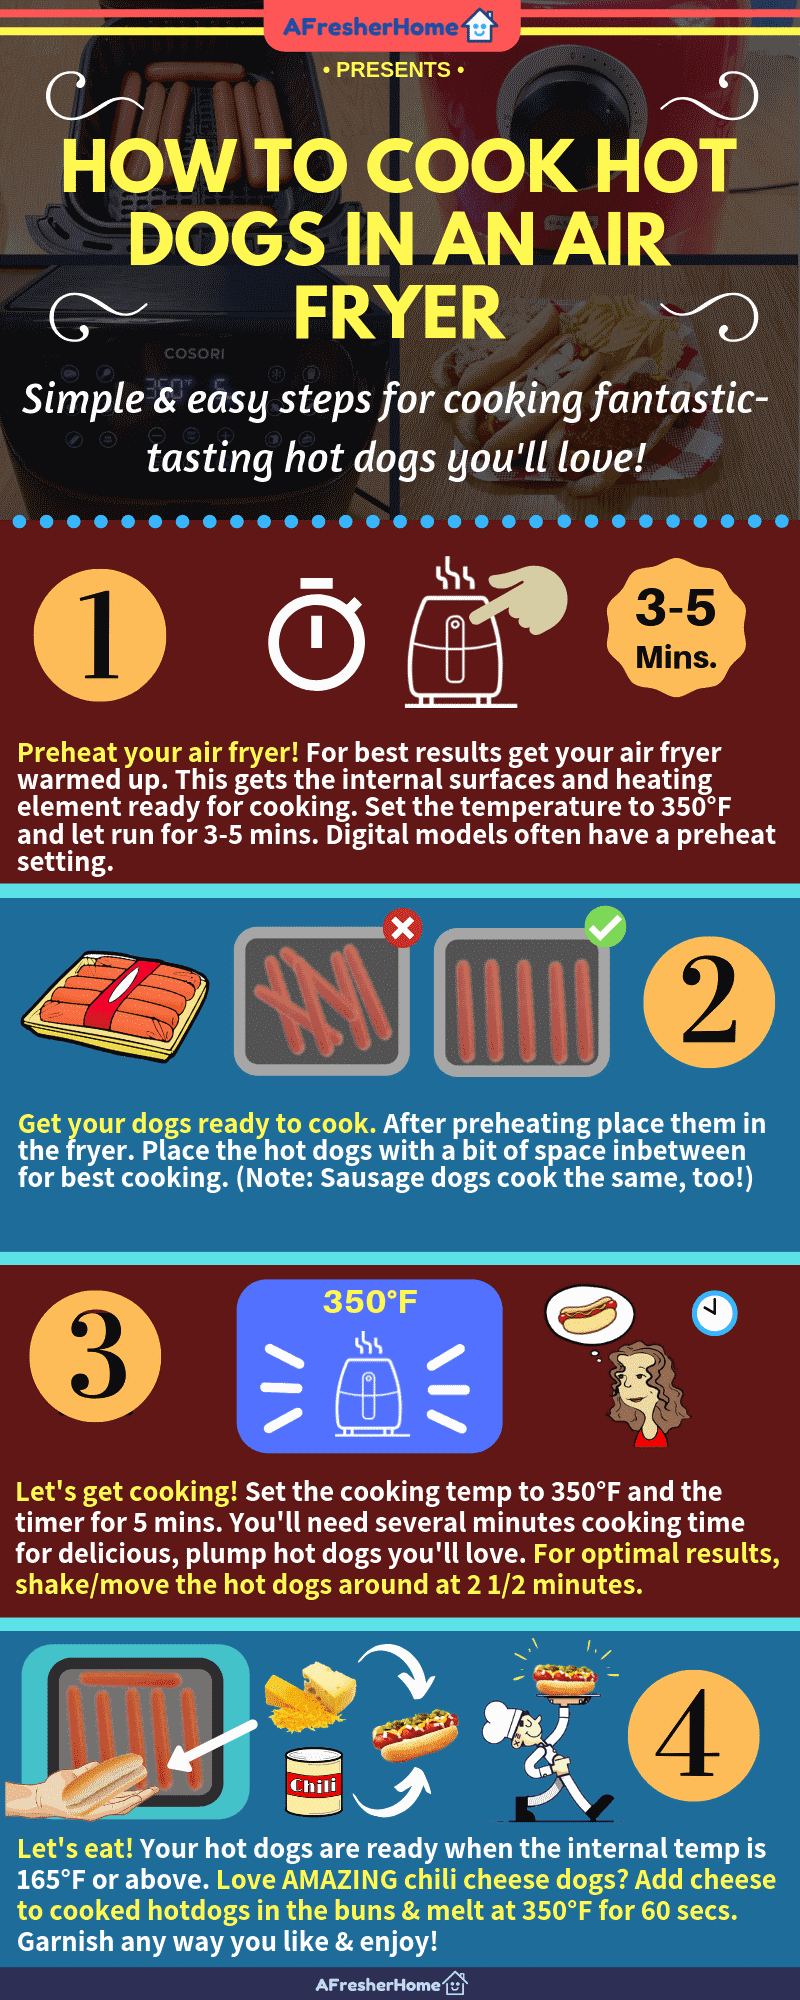
Quick summary: Cooking hot dogs in an air fryer
Cooking fresh, warm, and tasty hot dogs yourself is easy. However, it’s helpful to know some things ahead of time to avoid headaches or messing up your food.
- Preheat the air fryer – Typically you’ll just need to let the air fryer run at the cooking temperature (350°F is recommended) for 5 minutes
- Place the cold hot dogs in the fryer basket – For best results, shake the container to even them out inside. This provides room around them for the cooking air to move.
- Cooking: With the temperature set to 350°F is good, cook for 5 minutes. After 2 1/2 minutes, shake the container a bit to rotate and expose the uncooked sides or use tongs.
- Final cooking: Your hot dogs will be ready to eat after 5 minutes. Hot dogs are done when they’re slightly darker red and have an internal temperature of 165°F and above.
- For fantastic cheese or chili cheese dogs, place the dogs in buns, add sliced or shredded cheese, and melt for 60 seconds at 350°F.
You can also cook great sausage dogs, too! Read on to learn all the details.
How & why to preheat your air fryer
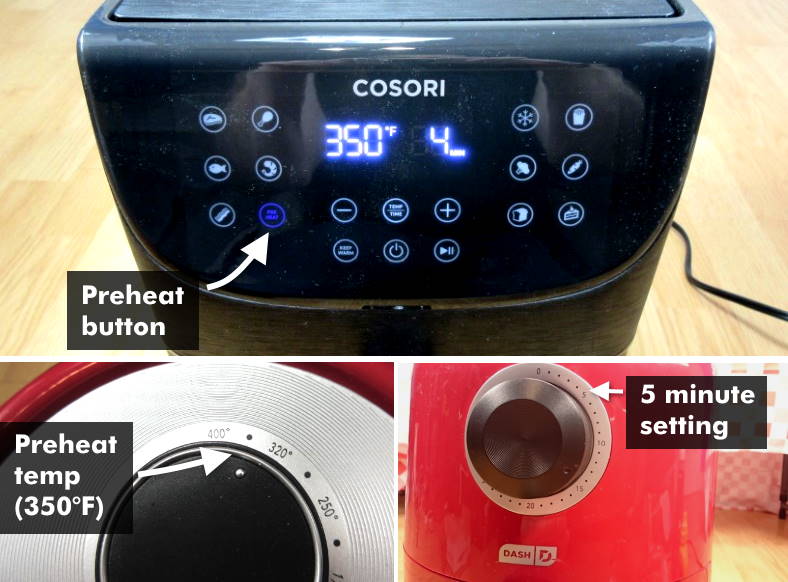
Top: Preheating an air fryer with digital controls. These often have a preheat mode button (some may use less than 5 minutes and adjust their time automatically). Bottom: For standard models, you can preheat the fryer by adjusting it to the 350 degree temperature and setting the cooking timer for 5 minutes.
Just like with regular ovens, air fryer makers recommend warming up the fryer to the cooking temperature before you add food. But why is that?
You should preheat your air fryer for several reasons:
- The electric heating element gets hot and ready to use
- Inside surfaces that touch & cook food are hot and ready to work properly
- Preheating avoids a warming delay that would happen if you started cooking from room temperature
Air fryer brands recommend doing this as it gets your air fryer ready to start cooking right away – it’s preheated (already heated) and ready to go. There’s no need to try to figure out cooking times as you would starting from a cold fryer.
It’s similar to how you warm up a car in cold winters before driving.
Preheating means proper cooking
For food that’s heated properly and cooks well, you’ll need to let your air fryer warm up. Doing this allows your meals to cook consistently and reliably.
It’s true that air fryers are small and don’t take as long as larger traditional ovens do. However, they still need a few minutes before they’re ready.
How to preheat your air fryer
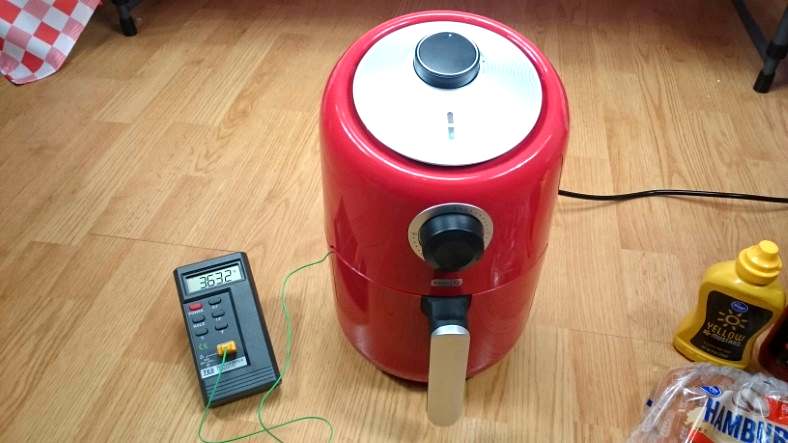
I recorded preheating times needed to get my air fryers ready before cooking frozen cheese sticks. I found out that they actually reach the cooking temperature before 5 minutes. However, the air fryer self needs the extra time (4-5 minutes total) to get completely ready. The internal surfaces will be hot and ready to cook the food as soon as it touches it.
Preheating is really easy! However, the way you go about doing it depends on the type & model of air fryer you own.
One of two ways are used:
- Digital controls/push button models: These often have a preheat button. When used, the unit will heat itself for the time required and then turn off. You can also set the temperature and cooking time manually to do the same thing. (Note: Some models may use a bit less time to preheat with automatic settings, which is fine)
- Air fryers with dial controls can be set to the cooking temperature for 5 mins cooking time. When the timer is done you’re ready to add food and start the cooking process.
In either case, 5 minutes is usually a great preheat time to use. For the preheating temperature, set it to 350°F as we’ll use that for cooking.
Getting your hot dogs ready to cook
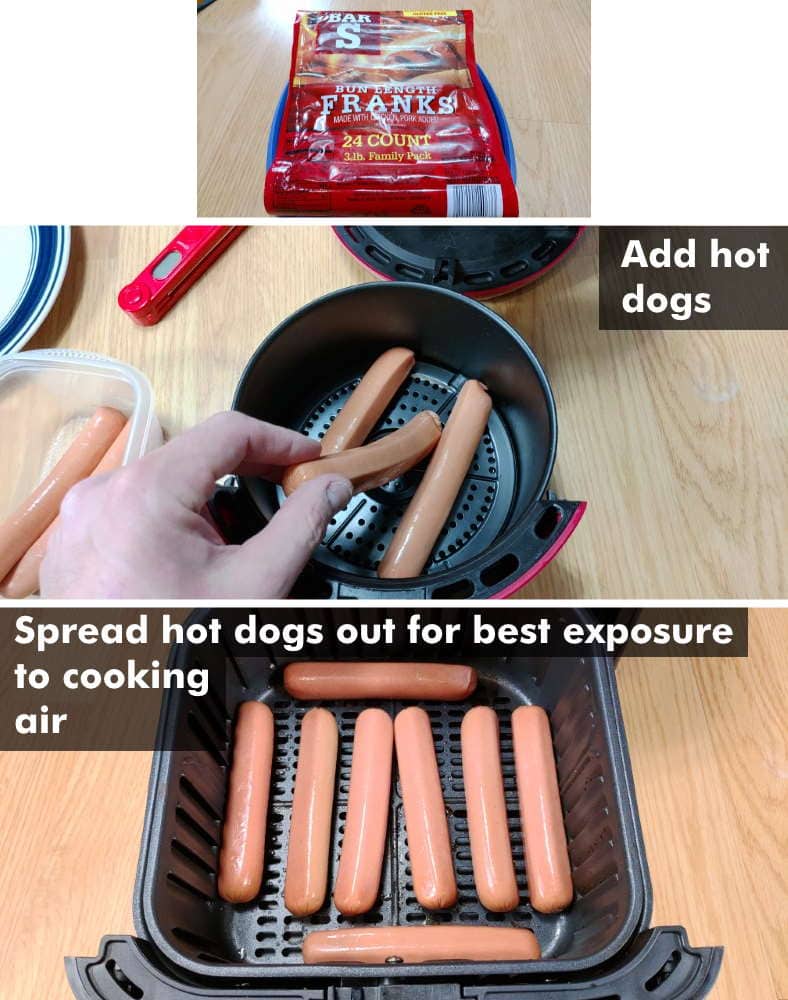
It’s a breeze getting your uncooked hot dogs ready for excellent cooking. For best results, put them in your air fryer’s cooking basket (food container) with a bit of space in between. This helps them get more exposure to the hot cooking air inside while it works. See my note further below about shaking or turning them during cooking.
Yes, I’ll admit that hot dogs are one of the easiest foods to cook. But if you want great taste and want to avoid overcooking or undercooking them, there are a few things to know:
- When loading the air fryer basket with the hot dogs, don’t put too many. There shouldn’t be so many that they cover each other a lot.
- Shake the basket container until the hot dogs “even out” or use tongs or your fingers. That is, shake or arrange them until they spread out a bit inside. This helps them cook better as they get more even exposure to the hot air that cooks them (This is really important if you’re cooking a lot of food in an air fryer).
- Place the fryer basket back inside the air fryer.
When cooking with an air fryer, it’s important to understand that the food cooks by being exposed to very hot cooking air blowing down on it from the top. Ideally, the food will have as much of itself as possible exposed and uncovered.
Covered sides on your hot dogs (or what’s facing down) will usually be cooked slightly less. That’s why I and the air fryer manufacturers recommend shaking or turning food 1/2 of the way through the cooking time.
How long should I cook hot dogs?
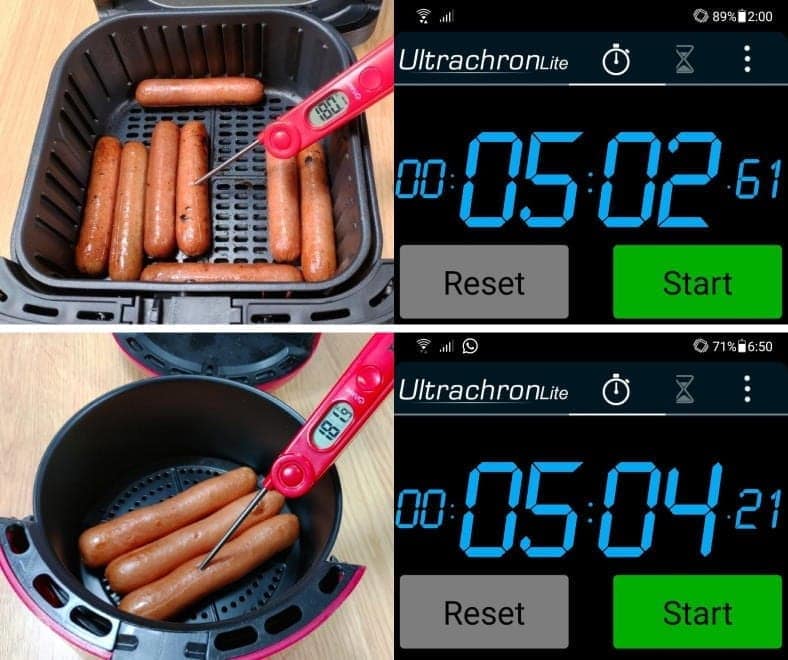
I measured cooking times for hot dogs until they were well done and tasted like they should Both the larger air fryer (a 3.7 quart Cosori unit) and the smaller one, a 1.2 qt Dash personal air fryer were used. Both needed 5 minutes for plump, well-cooked dogs with an internal temperature above 165°F as recommended.
To get a really accurate idea about how much time 2 common sizes of air fryers need for hot dogs, I carefully measured the cooking times for a Cosori 3.7 qt model (more of a family size air fryer) and a 1.2 qt Dash Compact personal air fryer (perfect for individuals or couples).
These were common refrigerator-temperature (cold, not frozen) franks, by the way.
Here’s what I found when testing the cooking times & watching the hot dogs:
- 0-1 mins: Starting to warm up.
- 1-2 mins: Interior of hot dog franks are no longer chilled; slightly warmer.
- 2 1/2 mins: Starting to plump and somewhat cooked; Some parts may be a bit darker. Time to shake or rotate.
- 3-4 mins: Turning a normal red color, plump, and very close to being ready to eat & tasting good.
- 5 mins: Plump, juicy, and tasty. Internal temperature is 165°F or above. Time to eat!
Unlike microwaved hot dogs (blah!) you’ll get juicy, naturally cooked hot dog meat that’s not about to explode. It’s actually a lot easier to use an air fryer as long as you’re careful with the timer.
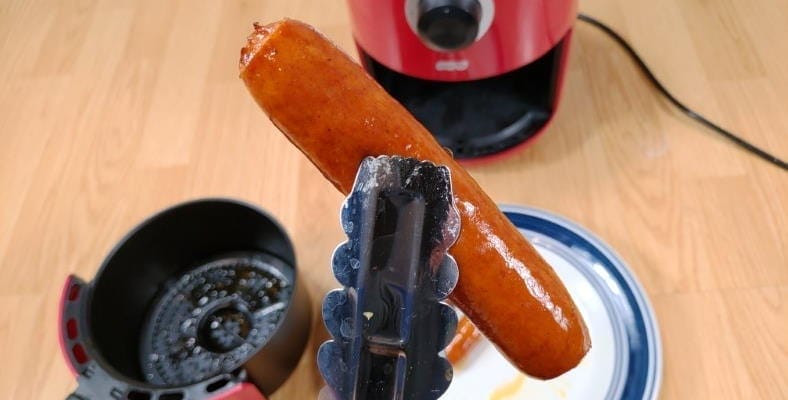
Closeup of a properly cooked hot dog after using an air fryer. The hot dog should be a darker red, plump, and soft. The taste is great when cooked well!
Don’t overcook your hotdogs. At around 5 minutes, some parts touching the hot cooking surfaces can start to crisp and turn a bit dark.
That’s another reason it’s best to turn them 1/2 of the way through cooking. As with other meats, properly cooked hot dogs will have an internal temperature of 165°F or above to make sure bacteria and other nasties are destroyed.
Don’t forget to shake them!
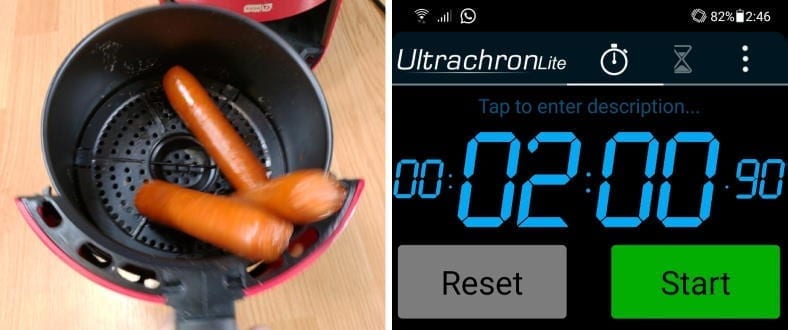
After about 2 or 2 1/2 minutes it’s best to shake or turn your franks. That’s because you’ll need to expose the areas which had less cooking heat previously and turn other areas to receive less heat.
While it’s not “necessary”, I strongly recommend shaking or turning the hot dogs at about 2 or 2 1/2 minutes during the cooking process. In my experience, air fryers do a great job but they can’t cover 100% of the food’s surfaces without your help.
It only takes a few seconds and will make sure your food gets enough hot air to give you the best results possible.

Tip: Want to be 100% sure? Use a digital food thermometer to check how well your foods are cooked. I use one regularly for many foods I cook with my air fryers.
Melting cheese for chili cheese dogs with an air fryer
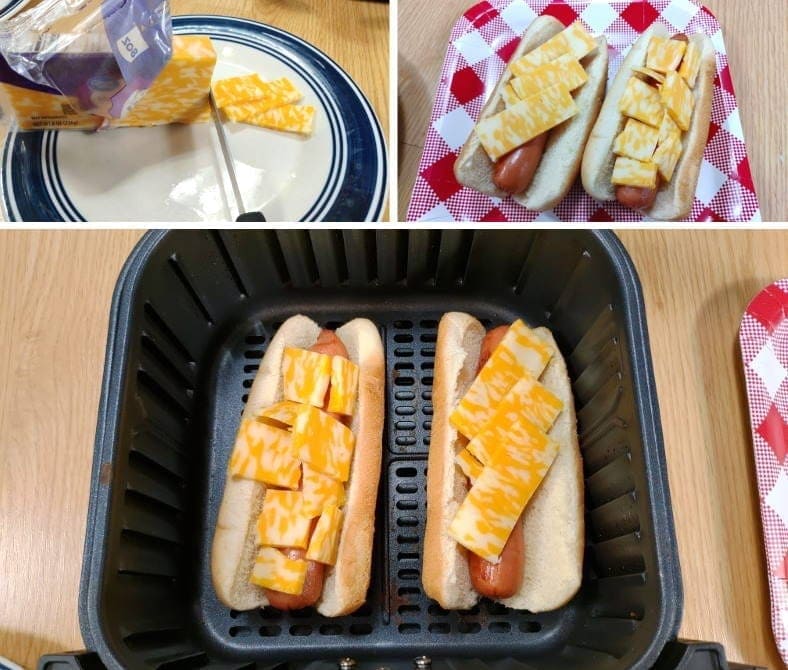
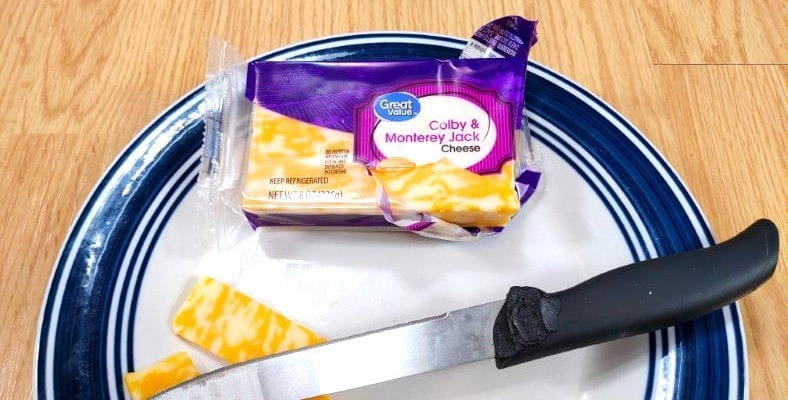
Got cheese? Let’s be honest, gas station (or other) cheeses options for hot dogs are TERRIBLE! Real cheese should taste like…well, real cheese! To get fantastic cheese dogs or chili cheese dogs, you can use ANY of your favorite choices with your air fryer. Even though real sliced block cheese is harder to melt, it’s a snap to do this way.
Not all chili cheese dogs are the same! There’s a reason I almost never get cheese dogs when we go out to eat – usually they’re awful!
However, my homemade air fryer cheese dogs were excellent!
The great news is that you can use any cheese options that work best for you and your budget:
- Grated cheese in the bag
- Sandwich slices
- Hand-sliced block cheese (my favorite!)
Of the three, block cheese is a bit harder to use as it’s harder to melt. However, the great news that I’ve figured out the easiest way to do it.
How to best melt your cheese & for how long

As it turns out, home-cooked chili cheese dogs are GREAT! I was so happy to FINALLY enjoy cheap, delicious cheese dogs I made myself. It’s fast too, as it only takes about 60 seconds even for block cheese slices which are harder to melt. Shown: Delicious, fresh hand-sliced Colby, and Monterey Jack pieces melted perfectly.
You’ll want to do the following:
- Cook the hot dogs first, as shown in the earlier sections
- Place the hot dogs in their buns, fresh out of the bag (or refrigerated is ok too)
- Cover the hot dogs evenly with grated/shredded, sandwich sliced, or hand-sliced cheese as desired
- Melt at 350°F for 60 seconds
The result will be cheese that’s properly melted, won’t be burned, and will remain soft and gooey for a few minutes before eating. However, I strongly recommend you add toppings and eat as soon as possible!
Adding chili and other toppings
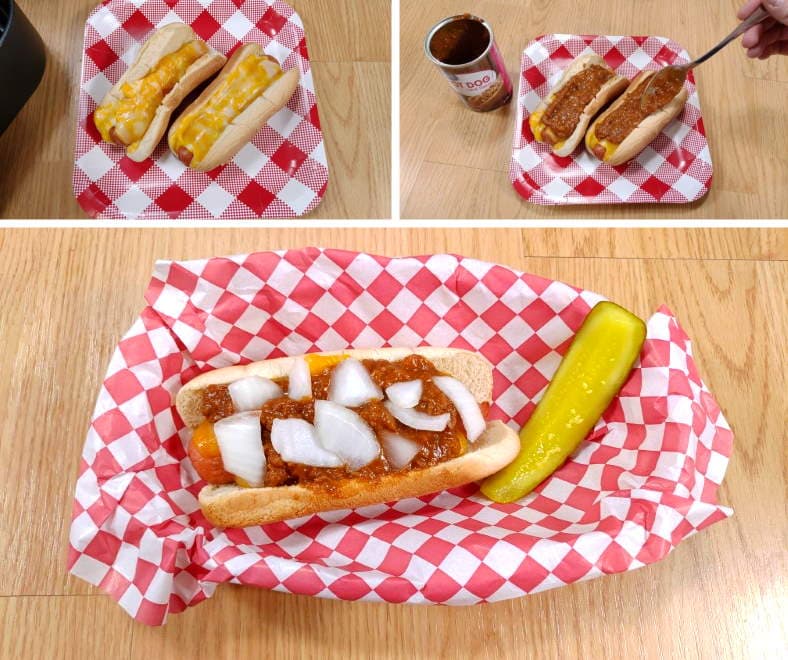
Eat with only cheese or add mustard, ketchup, or whatever suits your fancy. For seriously delicious chili cheese dogs, add hot dog chili from a can and onions if you like then enjoy! It’s fantastic!
After carefully measuring melted cheese time & temperatures (and using 350°F, making it easier) I got my perfectly melted cheese dogs.
To create fantastic chili cheese dogs, I simply added hot dog chili from a can at room temperature and then fresh-cut onions. The result was excellent!
While you can heat up your chili, mine was fine at room temperature. If you’d like to heat your chili a bit, place it in the air fryer once you’ve added the topics and use the warm setting for 2-3 minutes, or 30-60 seconds at 350°F.
What about sausage dogs and bratwurst?

Great news! Cooking bratwurst or other sausage dogs is exactly the same – and just as easy – as regular hot dogs. 5 minutes at 350 degrees and you’re done! For a wonderful traditional taste, add sauerkraut and onions as desired.
The great news is that your favorite sausages like bratwurst and traditional smoked types are cooked exactly the same in an air fryer!
Just like regular franks, cook for 5 minutes at 350 degrees and you’re ready. Don’t forget to turn them over at 2 to 2 1/2 minutes time, although it’s really not as important for sausages. (They cook slightly differently due to the different skin).
Garnish with sauerkraut, onions, and anything you like as desired. They’re great!
Final touches and it’s time to eat!
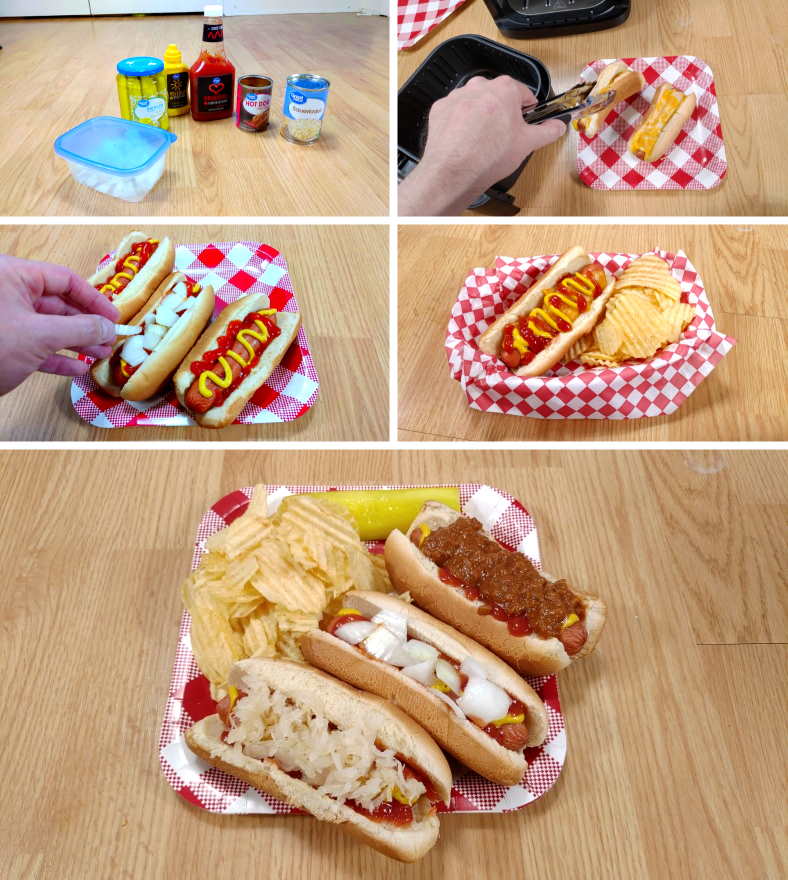
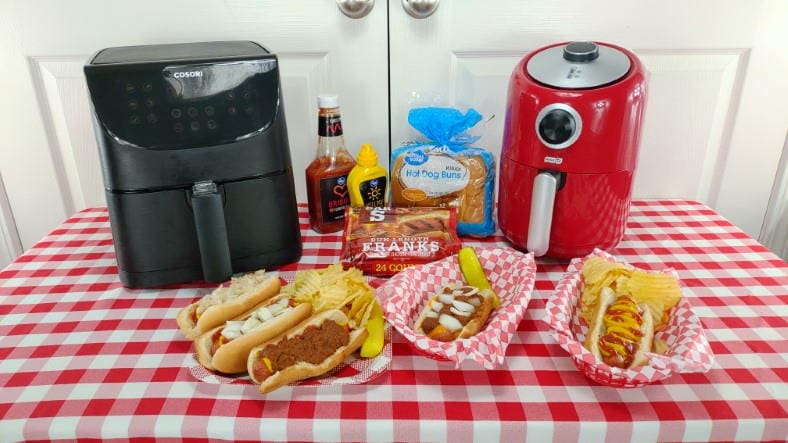
Examples of the delicious hot dogs I cooked in my air fryers and garnished to taste. Whatever your favorites are, they’re warm, fresh, and tasty once you cook them. Just add the perfect garnish like sauerkraut, ketchup & mustard, onions, or so much more! (Note: I highly recommend wavy potato chips – they’re an excellent side for hot dogs. They taste great and are inexpensive, too!)
Once you’re done cooking your franks, my advice is to add your favorite toppings while they’re hot and serve right away. There’s simply no substitute for fresh & warm hot dogs. (Reheating with a microwave will give you poor taste and won’t be nearly as good!)
The good news is that after cooking them, there won’t be much to clean up.
What to expect
While other foods you can cook in air fryers such as mozzarella sticks, burritos, chicken wings, and especially hamburgers can result in a greasy mess at the bottom of the air fryer basket, hot dogs are different.
In my experience, aside from sausages, there’s almost no residue. Note that sausages do leave a bit more as they contain more fats, but overall it’s still only a very small amount.
Note: I don’t recommend using a microwave oven to reheat your hot dogs if they get cold. The taste simply can’t compare, and microwave ovens also don’t correctly heat the outside surfaces of food. That’s one reason microwave-heated foods are very disappointing and seem to be missing the original flavor & texture you enjoy.
For best results, warm & crisp them back to a tasty & fresh state by reheating them in a hot air fryer at 350°F for about 1-2 minutes. Some air fryer models provide a warm setting (usually at around 170-180 degrees) but will take a few more minutes to do so.
Clean up & last notes
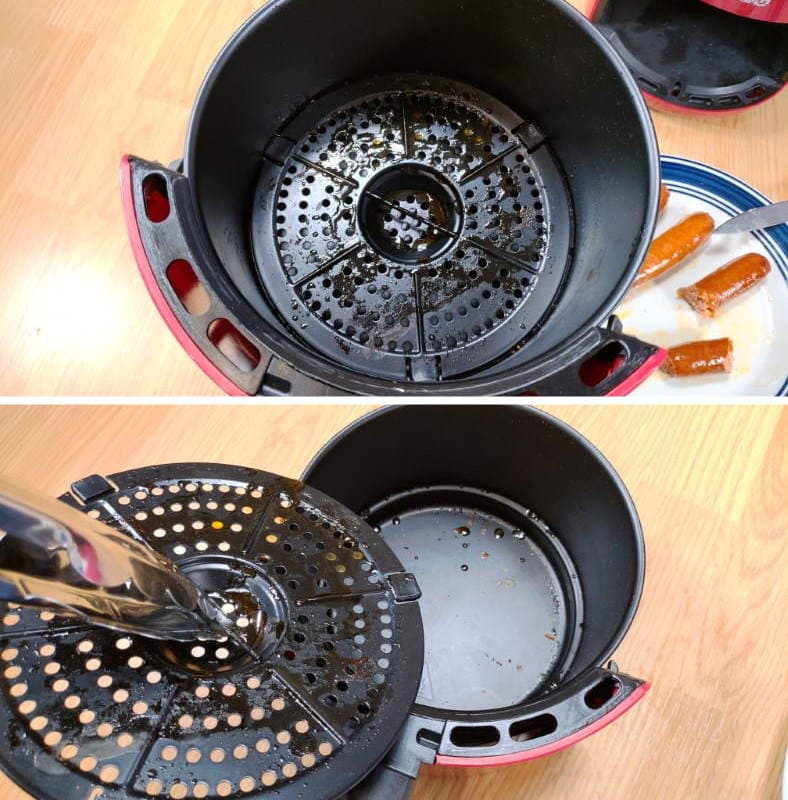
The great news is that hot dogs leave very little residue in your air fryer! While sausages leave more as they have more fat, as you can see above there’s not much to clean after cooking franks. It will only take a handful of seconds to clean up later.
Unlike other foods I’ve cooked (mainly frozen hamburger patties), there’s not much left over to clean up. Just a bit of residue from water and a very small amount of fat in the hot dogs.
Bratwurst and other types of sausages or sausage dogs do leave a bit more. Don’t ignore it, however, as all greases and food residues will develop a smell from bacterial growth after a few days if not cleaned.
Washing your air fryer after cooking
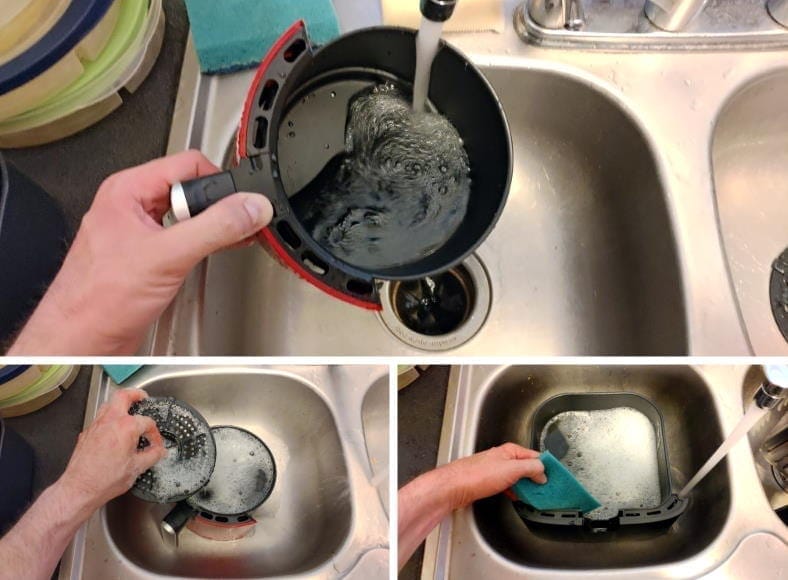
Washing out the fryer basket is really easy.
Just add a drop of dishwashing detergent after filling it with warm water. Any droplets of oil or greasy water residue will wash out without any real effort.
Add a small amount of dishwashing detergent and then use a soft sponge to avoid damaging the nonstick coating inside the cooking basket as most air fryers have that protective coating.
Wash briefly by hand, rinse out with water, and then leave to air dry. You’re done!