What comes to mind you hear the words “mozzarella sticks”? Is it soft, bland, reheated cheese sticks or delicious, fresh and hot cheese you can’t get enough of?
I hate poorly cooked cheese sticks so I did the hard work to find out the best way to cook them…and to help you do the same!
In this simple guide, you’ll learn how to cook frozen mozzarella sticks in an air fryer with excellent results.
It’s fast, easy, and you’ll love how they taste. Let’s go!
Contents
- Infographic – How to cook great frozen mozzarella sticks
- Quick summary: Cooking frozen mozzarella sticks in an air fryer
- How & why to preheat your air fryer
- Getting your mozzarella sticks ready to cook
- How long should I cook frozen mozzarella sticks?
- Final touches and we’re done. Let’s eat some cheese!
- Clean up & last notes
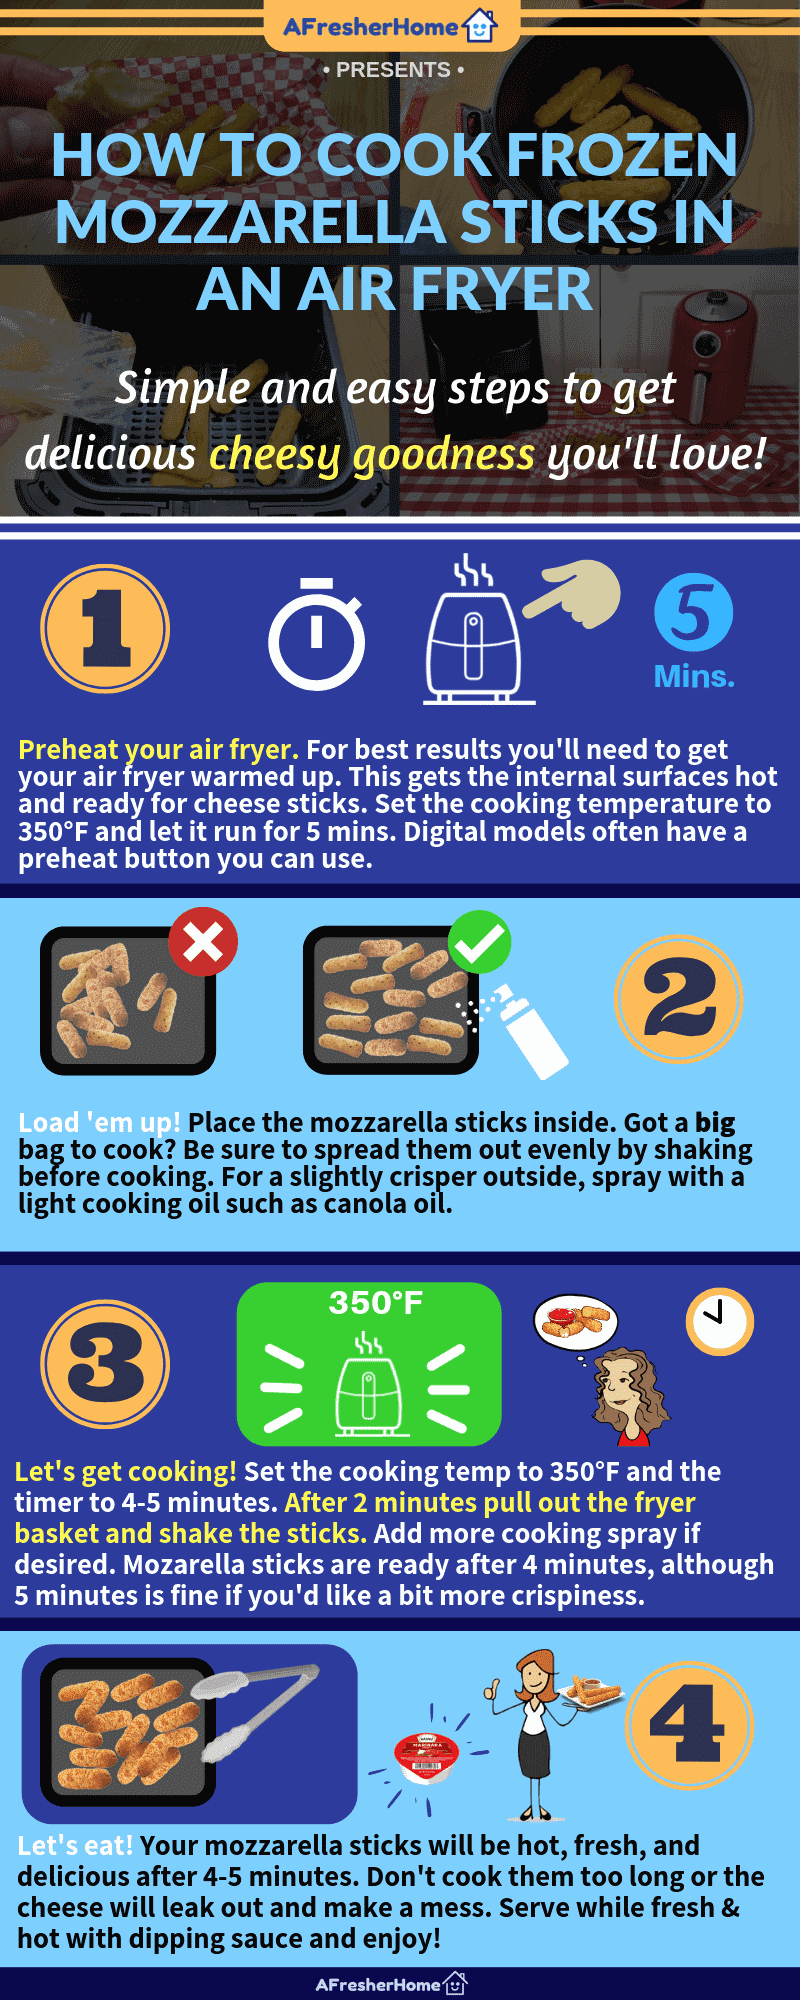
Infographic – How to cook great frozen mozzarella sticks
Quick summary: Cooking frozen mozzarella sticks in an air fryer
Cooking frozen mozzarella cheese sticks at home is very easy. However, it’s helpful to know some things ahead of time to avoid headaches or messing up your food.
- Preheat the air fryer – Typically you’ll just need to let the air fryer run at the cooking temperature (350°F is recommended) for 5 minutes
- Place the frozen sticks in the fryer basket – For best results, shake the container to even them out inside. For a slightly crispier outside, use a cooking spray to lightly coat them. Canola oil is a good choice.
- Cooking: With the temperature set properly (350°F is good), cook for 4-5 minutes. After 2 minutes, shake the sticks to turn over uncooked areas for hot cooking air. Spray cooking oil again if desired. Start the air fryer again.
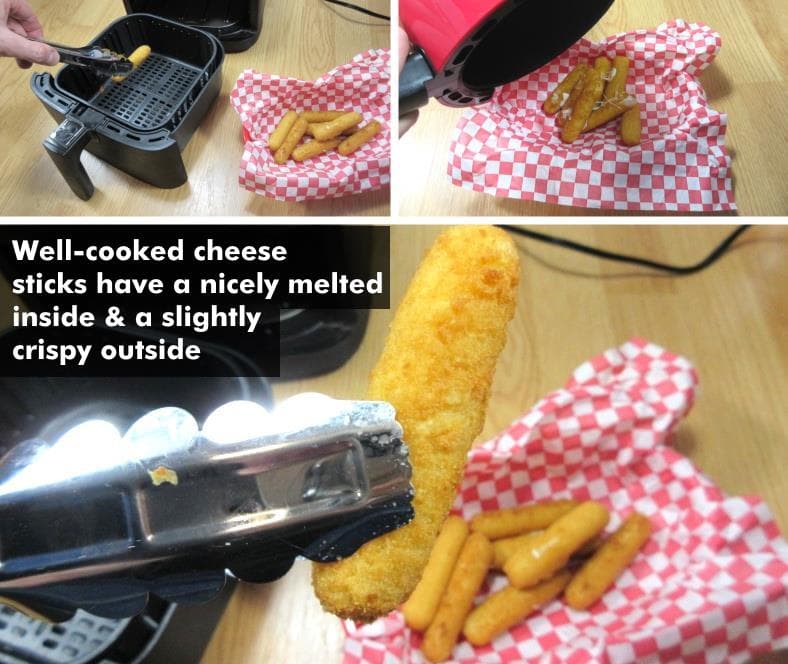
- Final cooking: Your cheese sticks should be ready to eat after 4 minutes. For a bit more crispiness, you can cook to 5 minutes time (note that cheese may leak in some cases). Don’t overcook the sticks.
- Empty the cheese sticks using a fork or tongs and serve. For best taste, serve immediately before the cheese can cool and the outsides soften. Add a dipping sauce like marinara and enjoy!
How & why to preheat your air fryer
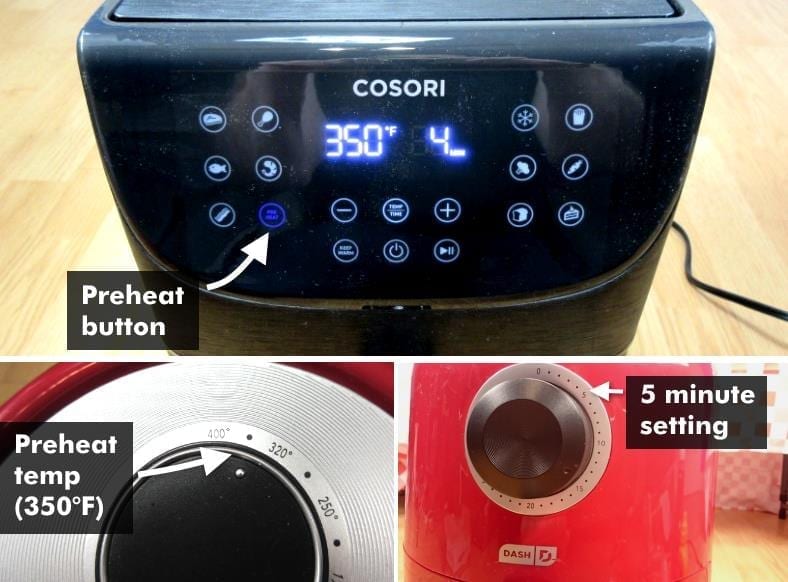
Top: Preheating an air fryer with digital controls. These often have a preheat mode button (some may use less than 5 minutes and adjust their time automatically). Bottom: For standard models, you can preheat the fryer by adjusting it to the 350° temperature and setting the cooking timer for 5 minutes.
Just like with regular ovens, air fryer makers recommend warming up the fryer to the cooking temperature before you add food. But why is that?
You should preheat your air fryer for several reasons:
- The electric heating element gets heated and ready to use
- Inside surfaces that touch & cook food are hot and ready to work properly
- Preheating avoids a warming delay that would happen if you started cooking from room temperature
In other words, you’ll get your air fryer ready to begin cooking right away – it’s preheated (already heated) and ready to use. You won’t have to worry about trying to adjust cooking time for a cold fryer.
As some people warm up their car during the winter cold before driving it, the idea is the same.
Preheating means proper cooking
For food that’s heated properly and cooks well you’ll need to let your air fryer warm up. Doing this allows your meals to cook consistently and reliably.
It’s true that air fryers are small and don’t take as long as larger traditional ovens do. However, they still need a few minutes before they’re ready.
How to preheat your air fryer
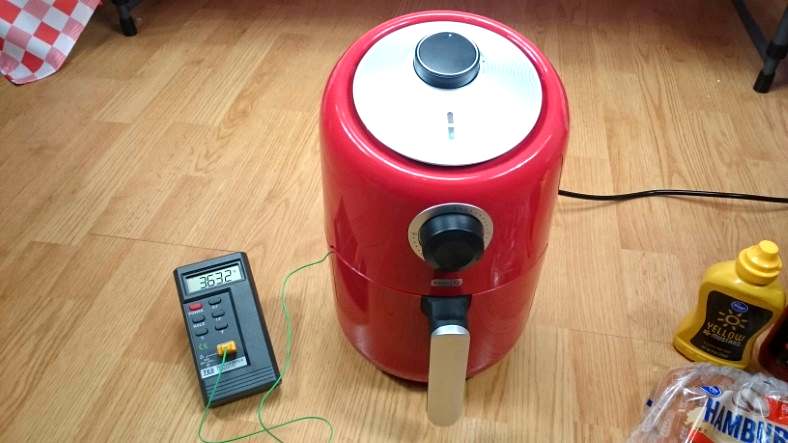
I recorded preheating times needed to get my air fryers ready before cooking frozen cheese sticks. I found out that they actually reach the cooking temperature before 5 minutes. However, the air fryer self needs the extra time (4-5 minutes total) to get completely ready. The internal surfaces will be hot and ready to cook the food as soon as it touches it.
Preheating is really easy! However, the way you go about doing it depends on the type & model of air fryer you own.
One of two ways are used:
- Digital controls/push button models: These often have a preheat button. When used, the unit will heat itself for the time required and then shut off. You can also set the temperature and cooking time manually to do the same thing. (Note: Some models may use a bit less time to preheat with automatic settings, which is fine)
- Air fryers with dial controls can be set to the cooking temperature and for 5 mins cooking time. When the timer is done you’re ready to add food and start the cooking process.
In either case, 5 minutes is a preheat time to use. For the preheating temperature, set it to 350°F as we’ll use that for cooking.
Getting your mozzarella sticks ready to cook
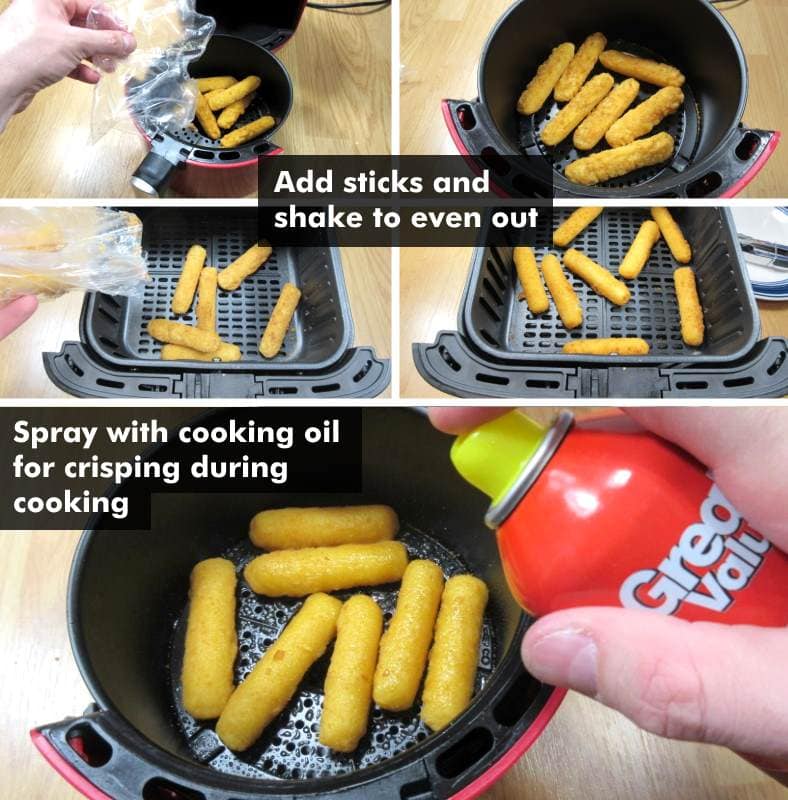
It’s easy to get your mozzarella cheese sticks ready for cooking in your air fryer. For the best results, fill the fryer basket with the frozen sticks then shake them to help even them out. This helps them get the best exposure to hot cooking air. As cheese sticks can be a bit soft on the outside when done, to help them cook better and for more crunchiness spray them with good cooking oil like canola oil.
Yes, it really is easy to cook cheese sticks, but I want you to get the tastiest, well-cooked cheesy goodness possible. Here’s how to get your frozen cheese sticks ready for the best cooking possible:
- Add the frozen sticks to the fryer basket. If you’ve got a really big bag of them, be sure you don’t pile them above the top edge of the container.
- Shake the basket container until the pieces “even out.” That is, shake them until they spread out a bit inside. This helps them cook better as they get more even exposure to the hot air that cooks them (This is really important if you’re cooking a lot of food in an air fryer)
- Since frozen cheese sticks may be a bit soft after cooking, you can help them crisp better by using light cooking oil before you start the timer. Spray them lightly until they look slightly wet. Canola oil cooking spray is a great choice.
- Place the fryer basket back inside the air fryer.
When cooking with an air fryer what you don’t want to do is to let your mozzarella sticks pile up inside. It’s important that they get exposure to the cooking air inside.
Food that’s stacked on top of each other (like when you’re cooking a large bag full of cheese sticks) won’t cook as well.
That’s one reason I recommend shaking them a bit.
Using a cooking spray

One great tip is to use a cooking spray like canola oil or olive oil to lightly coat your food before cooking. Doing so helps your food crisp better and get a wonderfully crunchy outside.
The same is true not only for cheese sticks but also for chicken wings, tater tots, french fries, and many other great foods you’ll want to cook in your air fryer. It’s a tip I picked up from my Cuisinart air fryer & toaster oven owner’s manual.
To use cooking spray with an air fryer, put the food inside then lightly coat the top of the food until it looks slightly wet. You won’t need much – just enough to coat the outer surface.
How long should I cook frozen mozzarella sticks?
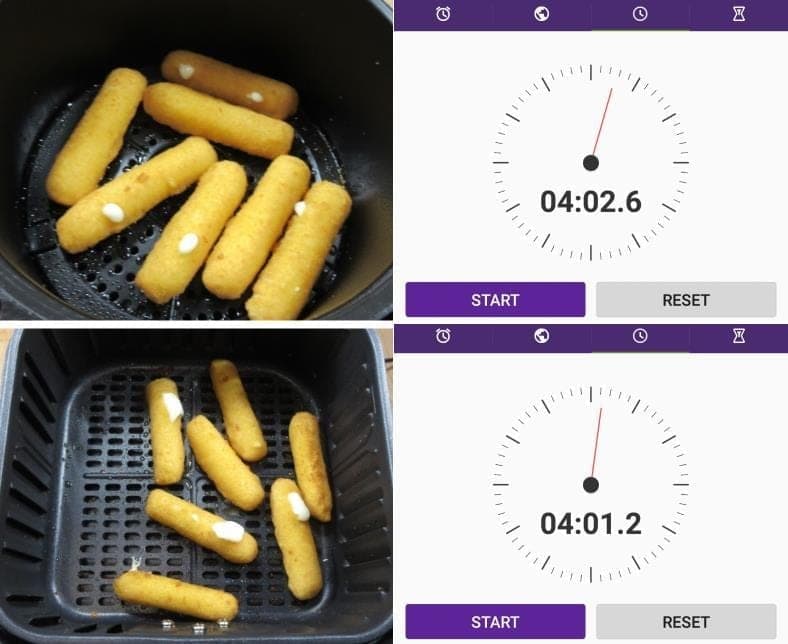
I measured cooking times for frozen mozzarella cheese sticks until they were well done and tasted good. Both the larger air fryer (a 3.7 quart Cosori unit) and the smaller one, a 1.2 qt Dash personal air fryer, only needed 4 minutes In both cases I shook the contents after 2 minutes and re-sprayed the canola oil.
To better test the size & power levels of air fryers that many people will use, I made tested cooking times using 2 sizes & power ratings: A Cosori 3.7 quart 1700W model (great for families) and a smaller personal air fryer, the Dash 1.2 quart 1000W model.
What I found is very interesting: Unlike other foods like fries, wings, or chicken nuggets, cheese sticks cook VERY quickly!
Here’s a brief timeline of what happens when cooking frozen cheese sticks:
- 0-1 mins: Thawing, starting to warm up
- 1-2 mins: Inside is no longer frozen or cold
- 2 mins: Need to shake the sticks & move around for good cooking heat exposure
- 3-4 mins: Outside is warming & crisping, inside cheese is heavily melted and hot
- 4 mins: Hot, fresh, and ready to eat!
Your cheese sticks will be ready to enjoy after 4 minutes of cooking. I cooked them for 5 minutes for a bit more crisping on the outside.
While crunchy cheese sticks are wonderful, the downside is that a bit more cheese may leak out as it’s so hot.
Be sure you don’t cook past 5 minutes because the cheese will liquefy and drip into the bottom of the container.
Don’t forget to shake them!
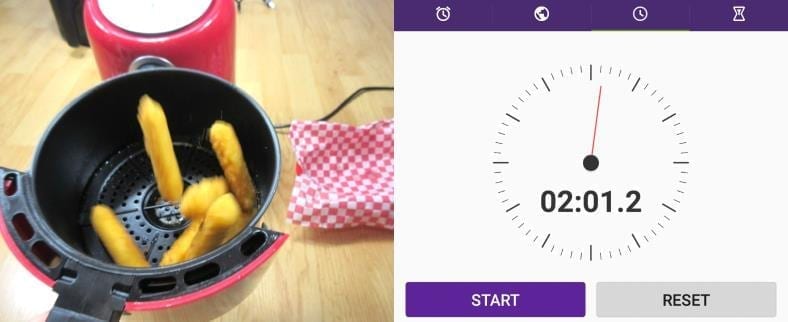
After 2 mins it’s a good idea to shake your cheese sticks inside the fryer basket. This helps expose lesser cooked sides to the hot cooking air. Lightly spray cooking oil again then place them back into the air fryer.
For the best cheese sticks, you can cook, remove them, and then shake them after 2 minutes. This will turn them over and the sides that had less exposure to the air fryer’s hot cooking air will now get more.
If you’re using a cooking spray, coat them again now.
Put them back into the fryer and you’re done in 4 minutes total time (Your fryer’s cooking timer should be set to 4 minutes already anyway.
Your mozzarella sticks should now be fresh, hot, and fantastic!
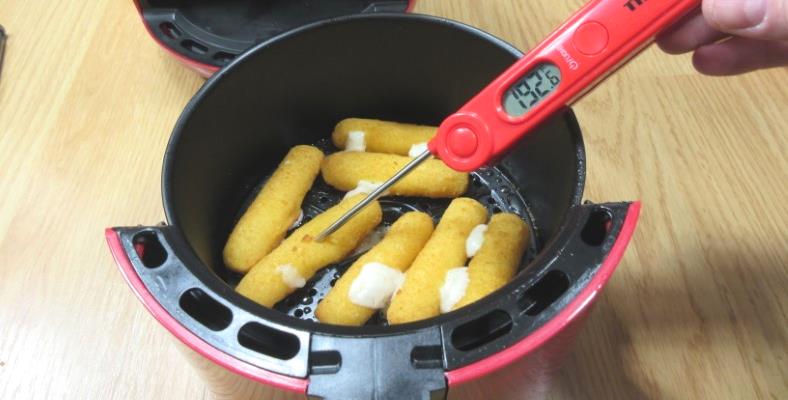
Tip: Keeping a digital food thermometer handy is a great idea. Using one, you can be sure frozen foods are cooked well by checking the internal temperature quickly (and cooking longer if needed). For frozen foods like cheese sticks or burritos, an internal temperature of 100°F and higher is good.
Final touches and we’re done. Let’s eat some cheese!
Cheese sticks are easy to empty and put on your plate or another container after cooking (unlike foods such as wings and tater tots for example). Use a fork or a tong to make it a snap. The great news also is that cheese sticks don’t produce a lot of oil when cooking so there’s not much to clean up afterward. Note: A little bit of cheese leaking from the sticks is normal, so don’t fret if you see some.
Once you’re done cooking either pour them out directly or use a fork or tongs. (I recommend getting a cheap pair of tongs as they’re very handy for the many kinds of air fryer foods you’ll want to make)
The great news is that there’s not much to clean up afterward in most cases as cheese sticks don’t produce oil when they cook as some other foods do.
What to expect
You might find some leaked cheese at the bottom of your fryer basket (see further below for what I mean) or a tiny bit of crumbs and residue, but that’s about it.
Properly cooked cheese sticks will still be very hot right after cooking so don’t use your hands. They’ll cool off quickly, however, so don’t waste much time before serving them.
I strongly recommend serving your fresh cheese sticks right away. They cool off quickly and just won’t taste the same when that happens!
The sauce makes it even better!
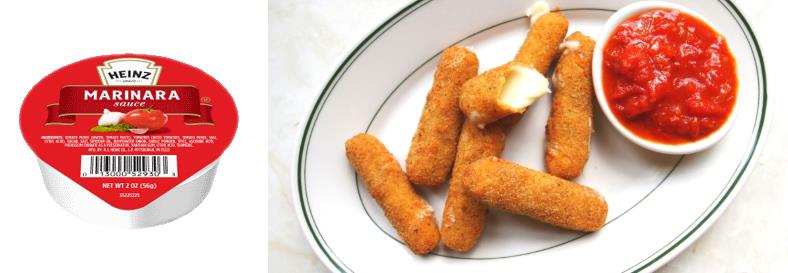
Pick up some marinara sauce as it makes a great dipping treat to eat with your fresh, hot mozzarella sticks you just made. It’s a traditional meal and I highly recommend it if you’ve never tried it.
Add some marinara dipping sauce and now you’ve got a hot, delicious, and cheesy snack or meal you’ll love!
Note: I don’t recommend using a microwave oven to reheat your sticks once they’re cold. It’s just not the same and won’t taste nearly as good.
For best results, warm & crisp them back to a tasty & fresh state by reheating them in a hot air fryer at 350°F for about 1-2 minutes.
The delicious results

Yay! It’s time to eat. Get ’em while they’re hot! Serve up your cheesy goodness with your favorite dipping sauce or sides. For a classic cheese stick meal, I recommend traditional marinara as it’s a great match.
You’re done and it’s time to eat! It’s amazing how fast, easy, and healthy cooking them yourself in an air fryer is.
In fact, I find that because they’re not cooked in dirty cooking grease like at a restaurant, they taste much better! There’s nothing between you and that REAL mozzarella cheese flavor – and no grease soaked into them or dripping to make a mess, either.
Clean up & last notes
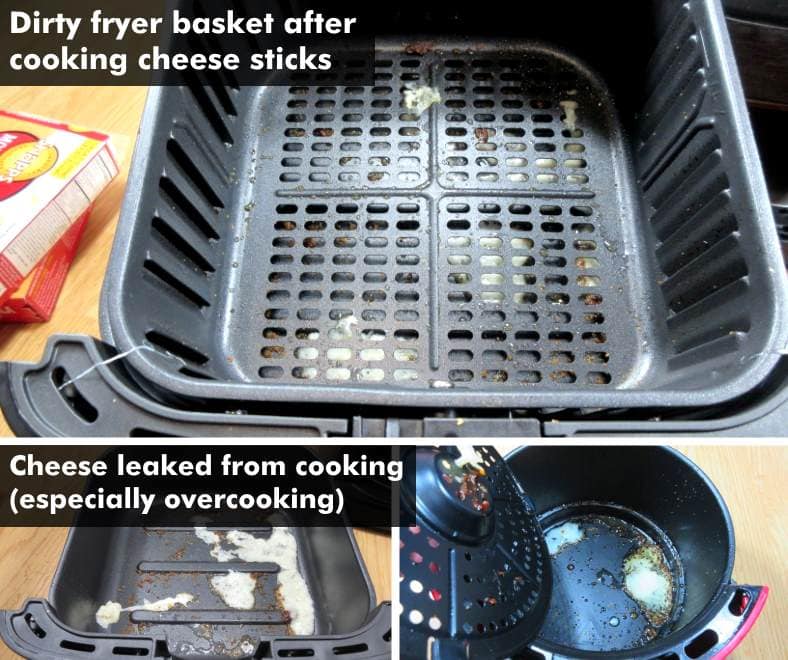
Things MIGHT get a little bit messy after cooking cheese sticks. Cheese sticks might leak a bit of cheese, so be aware there might be a LITTLE bit to clean up afterward. However, it’s actually very easy to clean so don’t worry!
What I discovered during cooking testing different foods in air fryers is that many foods (especially meats) like chicken wings tend to leave behind a fair amount of grease & fat after cooking
What’s especially great about mozzarella cheese sticks is that they don’t. While you’ll find a few crumbs and leaked cheese you’ll need to clean up afterward, it’s not bad.
To keep the leaked cheese to a minimum don’t cook them past 4 minutes. After 4 minutes I saw much more cheese leaking out of the sticks into the bottom of the basket.
Either way, clean up is really easy only takes a minute or two.
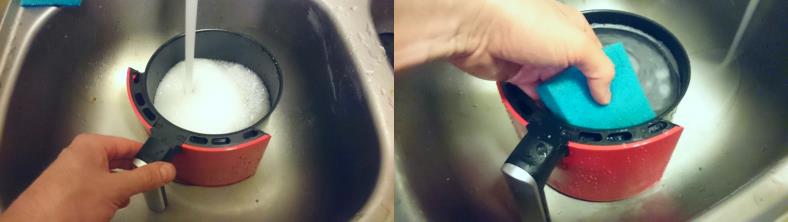
Washing out the fryer basket is really easy. Cleaning out leftover cheese is no problem at all.
Just add a drop of dishwashing detergent after filling it with warm water. Any leftover cheese will soften quickly and will be easy to wash out.
Gently wash the inside with a sponge or soft cloth because you don’t want to damage the nonstick coating inside. Washing a basket and its parts out usually only takes 60 seconds or less once the water is hot.
Let the parts air dry or use a towel if you like afterward. (Note: Most air fryer baskets are dishwasher safe so after cleaning out the drippings you can put them in the dishwasher)
Got a bag of these from a friend and had no idea how to cook them properly. This was a BIG help! Very clear and concise with excellent pictures. Thanks so much!!
Thanks for the comment, Mike! I’m glad to hear that. :)