Every time I’ve had tater tots while dining out they were a disappointment. Greasy, bland-tasting, and a big waste of money. In fact, I almost never order them anymore.
When I cooked tater tots in my air fryer everything changed. The results were fantastic – I couldn’t get enough of them!
Here’s a simple and easy guide to show you how to cook tater tots in an air fryer like a pro. You can get perfectly brown, crunchy, and delicious tots in 30 minutes or less!
Contents
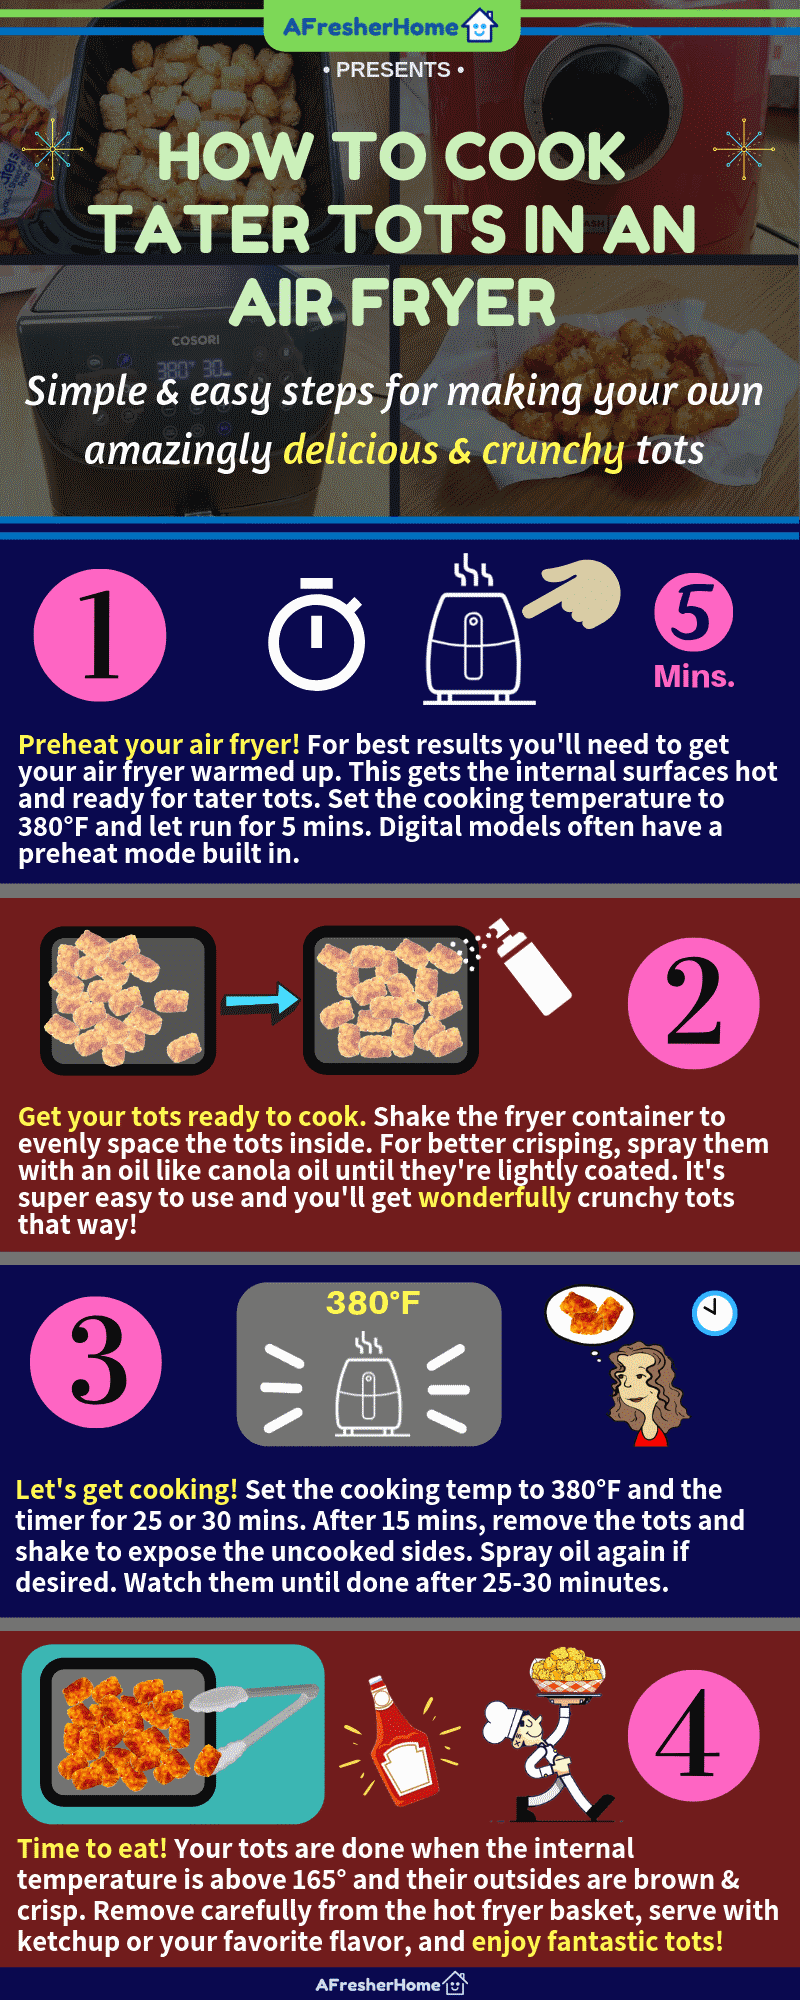
Infographic – How to cook great frozen tater tots
Basics first: Steps for cooking frozen tater tots
Cooking your own frozen tater (potato) tots at home is really simple. However, there are some details you’ll need to see to get the best results and avoid hassle.
First things first: Here’s a layout of the basics steps for cooking tater tots you’ll love to eat.
- Preheat the air fryer – Typically you’ll just need to let the air fryer run at the cooking temperature (380°F is recommended) for 5 minutes
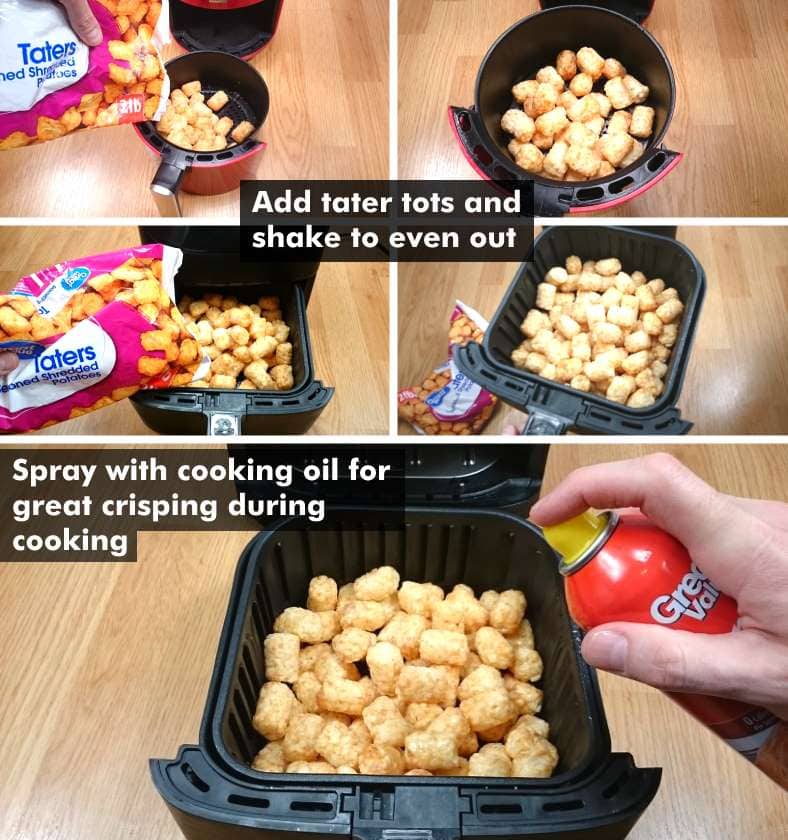
- Place the frozen tots in the fryer basket – To help cook better, shake the container to even them out inside. For great crisping, use a cooking spray to lightly coat with oil if desired. Canola oil is a good choice.
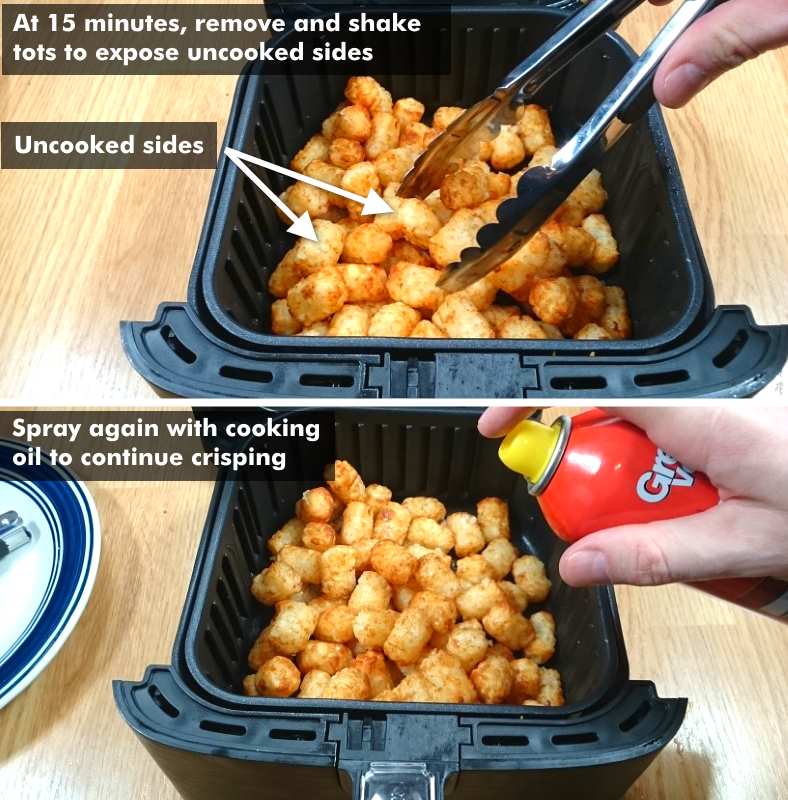
- Cooking: With the temperature set properly (380°F is good), cook for about 25 minutes. After 15 minutes, shake the tots carefully to turn over uncooked areas and expose to hot cooking air. Spray cooking oil again if desired. Start the air fryer again.
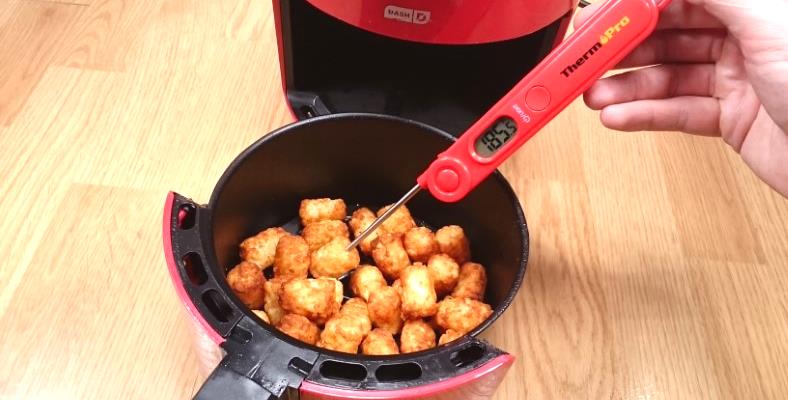
- Final cooking: Check the tots again after 20 minutes. When fully cooked, the internal temperature will be above 165°F and the outside browned and crisp. 25 minutes should be enough time to cook them well.
- Empty the tots carefully and avoid the hot fryer basket. Tots are easy to pour into a bowl or plate. A fork or tongs may help too.
How & why to preheat your air fryer
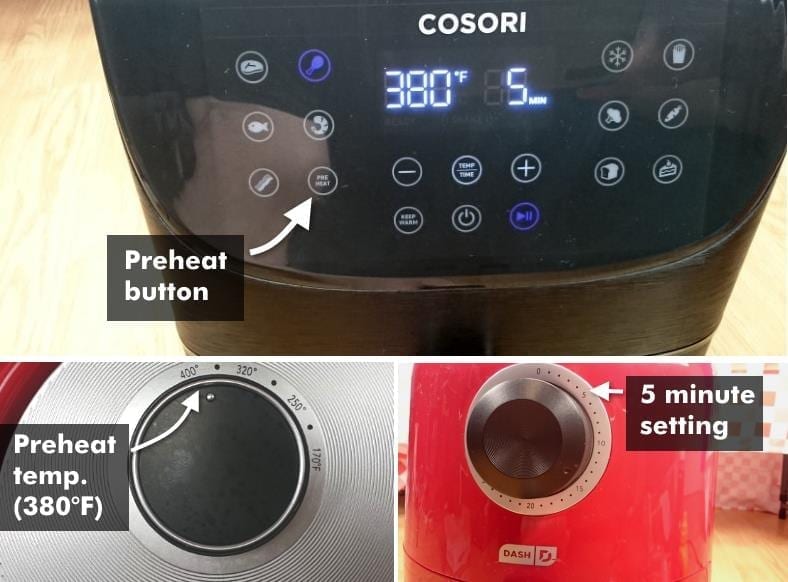
Top: Preheating an air fryer with digital controls. These often have a preheat mode button. Bottom: For standard models, you can preheat the fryer by adjusting it to the 380 degree temperature and setting the cooking timer for 5 minutes.
Just like with regular ovens, air fryer makers recommend warming up the fryer to the cooking temperature before you add food. But why is that?
You should preheat your air fryer for several reasons:
- The electric heating element gets heated and ready to use
- Inside surfaces that touch & cook food are hot and ready to work properly
- Preheating avoids a warming delay that would happen if you start cooking at room temperature
Basically, it just means you’ll get your air fryer ready to begin cooking right away – it’s preheated (already heated) and ready to use. You won’t have to worry about trying to adjust the cooking time for a cold fryer.
Just like in the winter when you warm up a car before driving, it’s a way to get your fryer ready to use.
Preheating means proper cooking
For food that’s heated properly and cooks well you’ll need to let your air fryer warm up. Doing this allows your meals to cook consistently and reliably.
Even though air fryers are small and don’t take a long time to warm up like traditional ovens, they still need a few minutes time before they’re ready.
How to preheat your air fryer
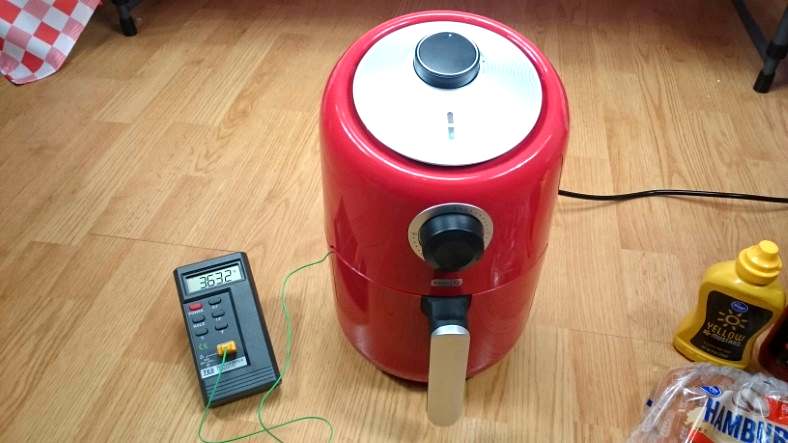
I recorded preheating times to 380°F for the air fryers used in this post before I started cooking tater (potato) tots. I found out that they actually reach the cooking temperature before 5 minutes. However, the air fryer self needs the extra time (5 minutes total) to get completely ready. The internal surfaces should be hot and ready to cook food when you put the food inside.
Preheating is really easy! However, the way you go about doing it depends on the type & model of air fryer you own.
One of two ways are used:
- Digital controls/push button models: These often have a preheat button. When used, the unit will heat itself for the time required and then shut off. You can also set the temperature and cooking time manually to do the same thing.
- Air fryers with dial controls can be set to the cooking temperature and for 5 mins cooking time. When the timer is done you’re ready to add food and start the cooking process.
In either case, 5 minutes is a preheat time to use. For the preheating temperature, set it to 380°F as we’ll use that for cooking.
Getting your tater tots ready to cook
It’s really easy & quick to get your tots ready for the best cooking possible. Fill the fryer container (basket) with the frozen potato tots. Next, shake them to help even them out and spread them within the container for best heat exposure. For a wonderfully crunchy & browned outside, use a light cooking spray and add a light coat before cooking. Canola oil is a great choice.
Now it’s time to get your tots ready. Don’t worry, though – it’s really easy and only takes a moment. You’ll also find it helpful for cooking french fries, wings, or other foods in your fryer too.
- Add the frozen tots to the fryer basket. Fries or tots shouldn’t go above the top edge of the container.
- Shake the basket container until the pieces “even out.” That is, shake them until they’re more evenly spread inside the container. This helps them cook better as they get more even exposure to the hot air that cooks them.
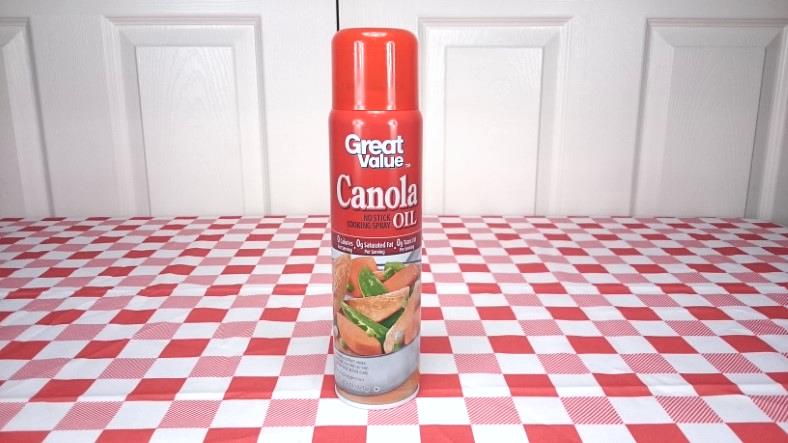
- For wonderfully crunchy and browned tots, spray lightly using cooking oil. Canola oil is a healthy choice and it’s very easy to use.
- Place the container back inside the air fryer.
When using an air fryer it’s important to avoid covering the tots up as much as possible. Food stacked on other pieces of food will cover surfaces and cause some areas to be undercooked.
That’s another reason you’ll need to shake the tots during cooking (I’ll cover this below).
Using a cooking spray
A helpful bit of advice is that you can use a cooking spray like canola oil, available in any supermarket to spray the food with. Doing so helps the food crisp better while cooking.
That goes not just for potato foods like french fries but also wings, chicken, and other types that are more fun to eat when crunchy on the outside. It’s a tip I picked up from my Cuisinart toaster oven/air fryer owner’s manual.
To use cooking spray with an air fryer, put the food inside then lightly coat the top of the food until it looks slightly wet. You won’t need much – just enough to see on the top of surfaces.
How long should I cook frozen tater tots?
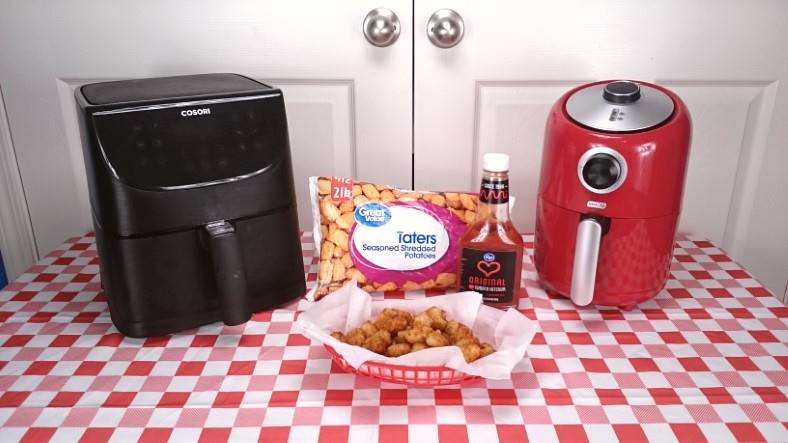
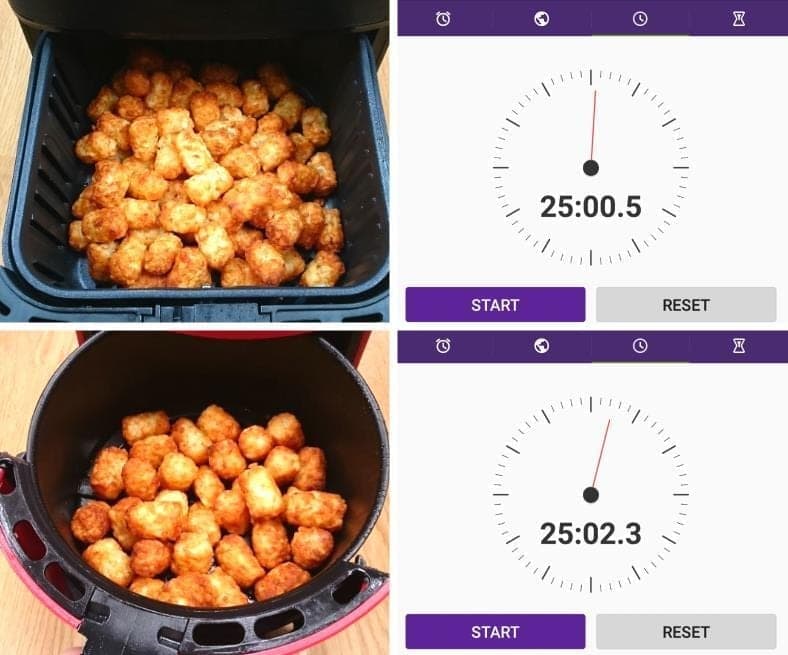
I carefully recorded cooking times while checking the tots every few minutes to get perfectly cooked tots. My larger air fryer (a 3.7 quart Cosori unit) and the smaller one, a 1.2 qt Dash personal air fryer, both were done after 25 minutes of cooking time. In both cases, I shook the contents after 15 minutes and re-sprayed the canola oil.
As not everyone has the same size air fryer I made sure to test cooking times using 2 sizes: A larger & popular Cosori 3.7 quart 1700W model (more suitable for families) and a smaller personal air fryer, the Dash 1.2 quart 1000W model.
What’s interesting is that unlike some other foods, in the case of tater tots both were done in 25 minutes.
That’s a bit different from what I’ve seen when cooking hamburgers, wings, and other thicker foods.
Here’s a brief timeline of what happens when cooking frozen tater tots:
- 0-8 mins: Thawed out, starting to warm up inside
- 8-10 mins or so: Beginning to brown a bit on the outside slightly
- 10-15: Insides are cooked decently, outside becomes crisped and browned
- 15 minutes: (Shake, re-spray, and start cooking again)
- 20-25 mins: Newly exposed, uncooked sides are crisping and browning
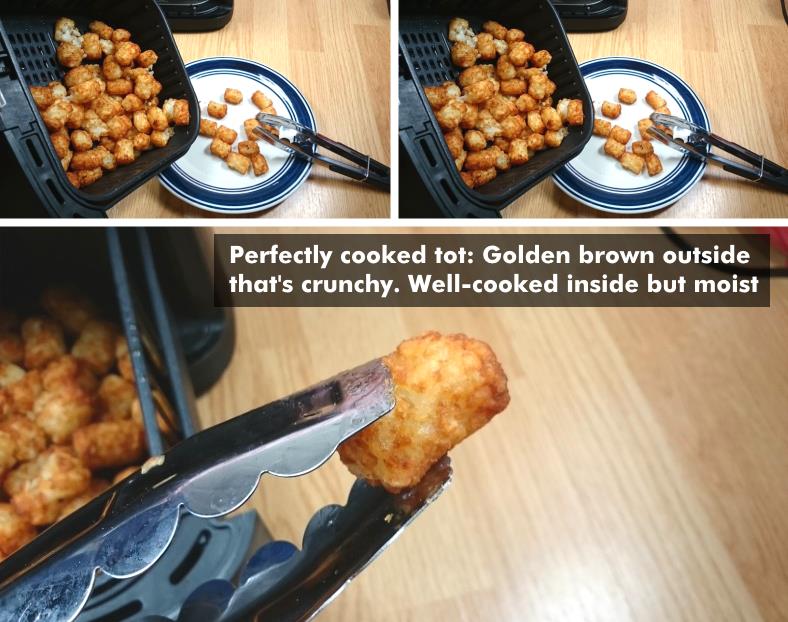
- 25 mins: Crunchy, hot, and ready to eat!
Don’t forget to check & shake!
Shaking your tots during cooking is important for getting perfectly evenly cooked results that you’ll love eating. Once 15 minutes of cooking time has passed, remove them, and shake (or use a fork or tongs, if helpful) to expose the unfinished sides. Lightly spray cooking oil again then place them back into the air fryer.
For the best tots you can cook, remove them and shake after 15 minutes. When doing so you’ll want to turn them over to expose the unfinished sides of the tots to face upwards.
I recommend spraying again lightly with cooking oil too.
Put them back into the fryer and check again at 25 minutes (your timer should be set for 25 minutes anyway). Your tots should be completely done and fantastic!
Tip: You can be confident how well food is cooked by using a digital temperature gauge with probe to check. When the temperature inside reaches 165° and above the food should be safe to eat and nearly done (depending on the outside too).
Last touches and we’re done. Time to eat!
Unlike wings or other heavier foods, tater tots are fine (and pretty easy) to pour out directly from the container into a plate or container. They don’t produce a lot of oil that can spill as meats do. When using tongs or a fork to empty the fryer basket, use care as they’re easy to break apart.
While I usually recommend against pouring food directly from the fryer basket into a plate or container, it’s different for tater tots, french fries, and potato wedges. That’s because they don’t produce a lot of leftover oil and fat that can spill like chicken wings or other meats do.
Just carefully pour them directly from the container while being careful not to touch the hot metal. A fork or tongs can help too, but be careful not to scratch the non-stick coating inside or to break the tots open.
I learned the hard way that tater tots are easy to break open by accident with tongs.
I strongly recommend serving your fresh tots right away as if left to grow cold they’ll lose their crunchiness and won’t taste the same!
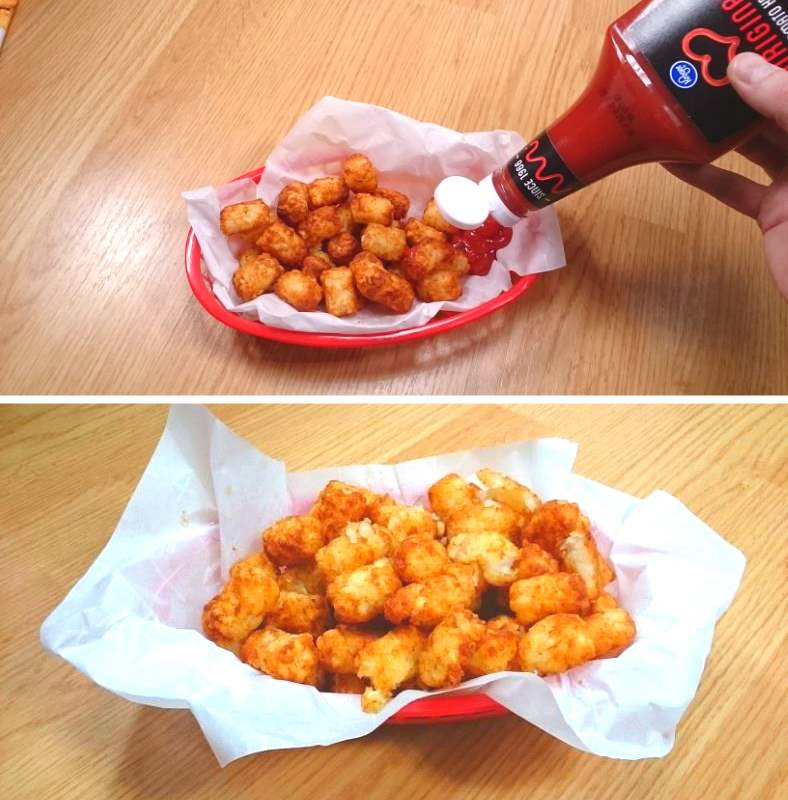
Add a good brand of ketchup (or other tasty sauce you love) on the side, and enjoy!
Note: Don’t use a microwave oven to reheat cold or soft tots. It won’t work and honestly, the taste is pretty disappointing compared to fresh ones.
You can warm & crisp them back to a delicious, fresh state by reheating them in a warm air fryer at 380°F for about 5 minutes.
Yes, you’re done – time to eat! After cooking add good ole’ ketchup or your favorite side sauce, then dig in! You’ll be enjoying AMAZING tater tots that are BETTER than from a restaurant! Healthier, non-greasy, and even taste better…I couldn’t believe it until I cooked my own. Simply fantastic!
Let me be completely honest: I never thought I’d enjoy tater tots after how many times I’ve been served soggy, tasteless, and cold ones in restaurants (while dripping grease, too!).
However, cooking my own tots in my air fryers was an amazing experience – I love them!
Plus the amount of time, hassle, and money you’ll save is great, too. Cooking them yourself at home when you want is a very cool & empowering feeling.
Not only that, but as well as being better tasting and crunchier, they’re much healthier, too! There’s no shortening oil to put in your body or to make a mess.
Clean up & last notes
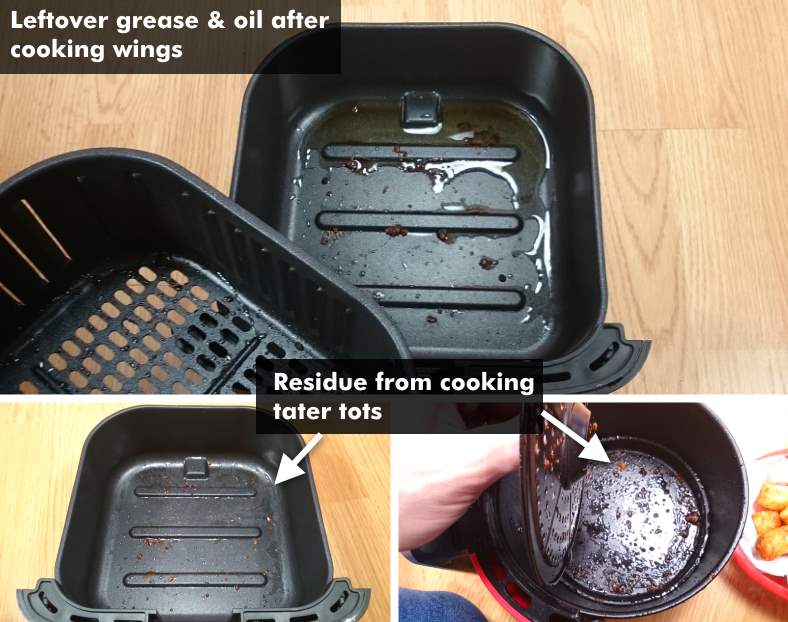
Check out what’s left over after cooking different foods! The good news is that while foods like wings and hamburger patties can leave over some messy fat & grease, tater tots leave almost nothing. They’re 100% pure potatoes, after all. You can expect to have to clean up a tiny bit of residue and crumbs, however.
Many foods you cook in an air fryer like hamburgers tend to leave a fair (or high) amount of fat and grease behind. That’s not the case with tater tots, french fries, and other foods like them.
I did have a very small amount of crumbs and residue left over to clean up, but it was almost nothing. Clean up is a snap!
To clean up your air fryer basket after cooking, just add a drop of dishwashing detergent after filling it with warm water.
Clean the inside with a soft washcloth or sponge as you don’t want to damage the nonstick coating with an abrasive cleaner. It only takes a few seconds and you’re done.
Allow the parts to air dry or dry with a towel if you prefer.
(Note: Most air fryer baskets are dishwasher safe so you could do it that way as well)
